Introduction
This guide will walk through the correct installation procedure for the Grimm OffRoad Jeep JL/JT Steel Bumper Winch Mount.
Consumer Warning
All Grimm OffRoad products must be installed by a competent and qualified individual in accordance with the installation instructions intended for the product. Incorrectly installed products will void any warranties and may result in damage to the product or damage to the vehicle it was installed on. Read any provided instructions or guides and watch any available videos before attempting installation. If there are any questions, please contact Grimm OffRoad before starting installation.
Many products require the vehicle be properly raised and supported off the ground. The installer is responsible for confirming that this may be done in a safe manner and the correct equipment is available to perform the installation. Grimm OffRoad installation instructions assume the installer is able to properly and safely lift the vehicle.
Vehicles that have been modified will not perform the same as a stock vehicle. It is incumbent upon the owner of the vehicle to be aware of the differences the modifications will make to the driving characteristics of the vehicle. These may include (but are not limited to): changes in handling, braking, rollover angle, incompatibilities with the factory anti-lock braking systems, stability control systems, or traction control systems.
Supporting Parts
This Grimm OffRoad product is designed to be used in conjunction with a Warn Zeon or VR EVO winch. Other winches may fit, but it is up to the installer to determine compatibility. It is important to review and familiarize yourself with the instructions provided with the winch before beginning installation.
Tools
Parts
- Winch Mounting Plate
- Fairlead Mounting Plate
- Bumper Spacer × 2
- M10x1.5 x 40mm Button Head Screw × 2
- M10x1.5 x 70mm Button Head Screw × 2
- M10 Washer × 4
- M10x1.5 Nylock Flange Nut × 4
- M10x1.5 x 35mm Flanged Hex Head Screw × 6
- M8x1.25 Nylock Flange Nut × 5
- High Strength Threadlocker
- M10x1.5 Hex Rivet Nut × 4
- M12x1.5 Hex Nut (For Installing Rivet Nuts)
- Warn Zeon or VR Evo Winch
Video Overview
-
-
Verify that all parts shown in the picture are present.
-
-
-
Remove plastic trim filler plate between the front bumper and the grill. Use a flat blade screwdriver or trim removal tool to remove the two plastic rivets.
-
Disconnect the fog light wiring plug on the outside passenger side frame rail. Disconnect any other light or electrical harnesses connected to the front bumper.
-
Using a 13mm socket, remove the seven bolts securing the skid plate to the bumper and frame.
-
Using a T45 torx bit, remove the 5 torx head screws securing the winch blanking plate on top of the bumper.
-
These torx screws can be reinstalled after the blanking plate has been removed with the five provided M8x1.25 flange nuts.
-
-
-
Designate a spot to place the bumper after removal. We recommend putting a towel or cardboard down so the bumper does not get scratched or damaged.
-
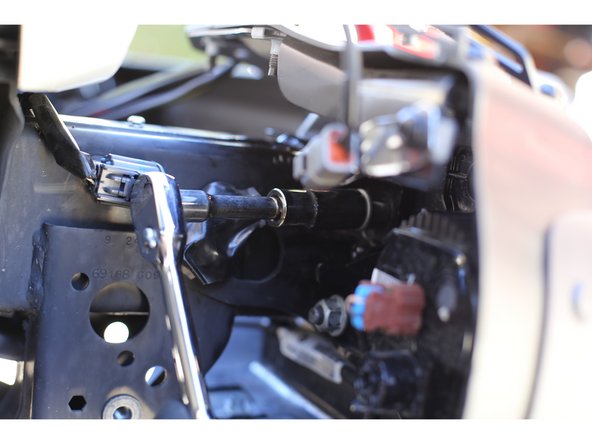
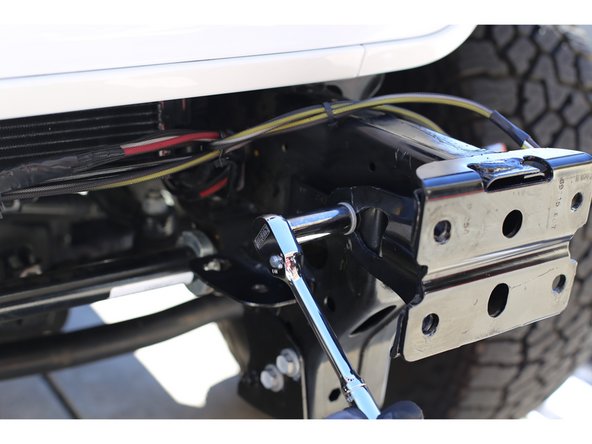
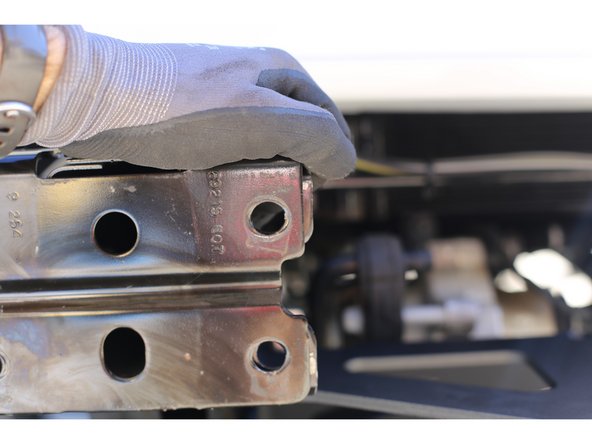
Remove the four nuts securing the bumper to the frame using an 18mm deep socket with a short extension.
-
Remove the bumper from the frame. Pull the bumper straight forward, it can require significant force to come out. There are tabs on each side of the bumper that interface with the frame to keep it in place even with the nuts removed.
-
Place the bumper on the ground, or a work bench, oriented as it was on the vehicle so there is access to the top and front of the bumper.
-
-
-
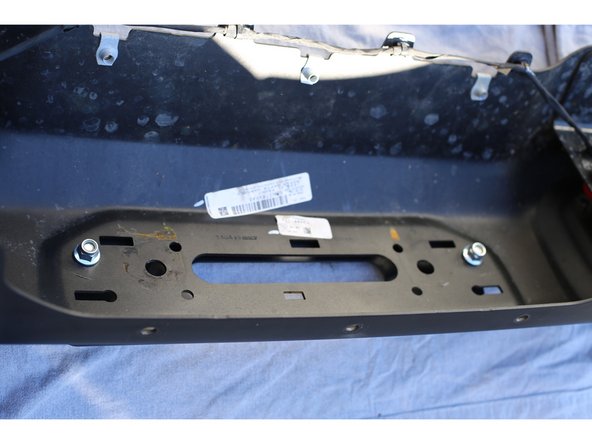
Using a flat blade screwdriver, remove the plastic blanking plate or license plate mount from the front of the bumper by freeing the 6 clips.
-
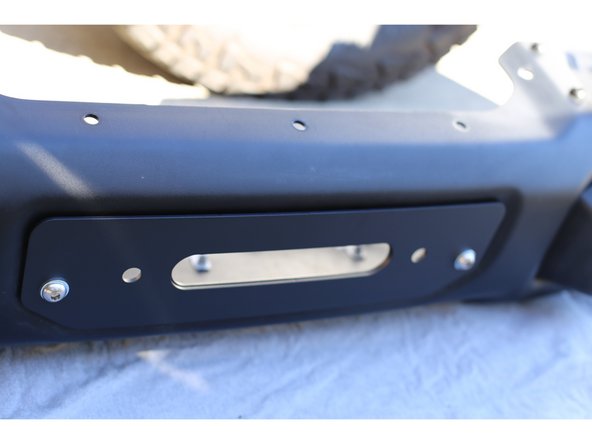
Using the two provided M10-1.50 x 40mm stainless steel button head bolts with a washer under each bolt head, attach the Grimm OffRoad Fairlead Mounting Plate to the bumper in place of the factory blanking plate. Place the bolts in the outer holes.
-
Make sure the fairlead opening on the Grimm Fairlead Plate and the factory bumper line up before tightening.
-
Using an M6 allen key and 15mm wrench, torque hardware to 40 lb-ft [54 Nm].
-
Locate the Grimm OffRoad Bumper Spacers, the silver colored plates with 4 holes. Orient these so the 'slot' is up and slide them over the 4 mounting studs on each side of the bumper.
-
-
-
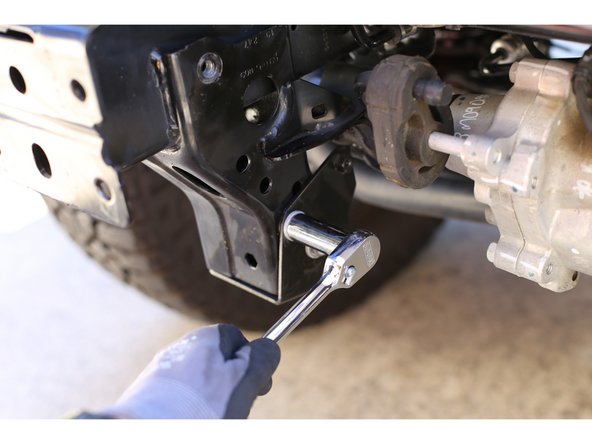
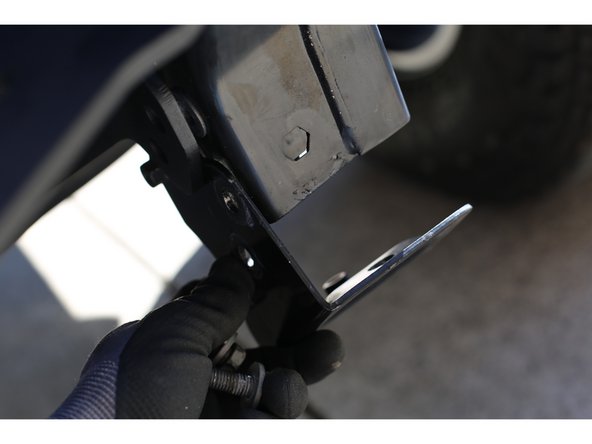
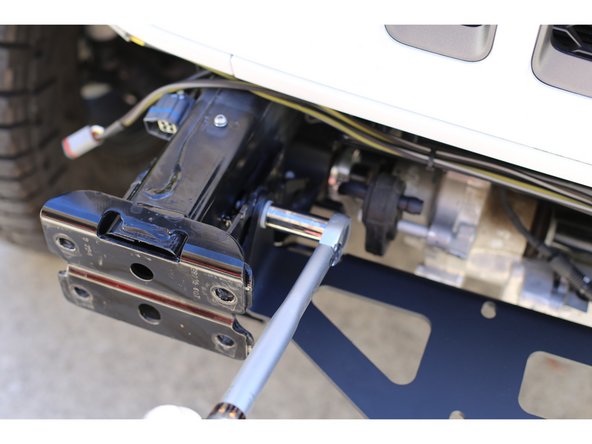
Using a 16mm socket remove the 2 bolts on the inside of each frame rail that hold the skid plate mounting plates on. Place the skid plate mounting plates close by, they will be re-used.
-
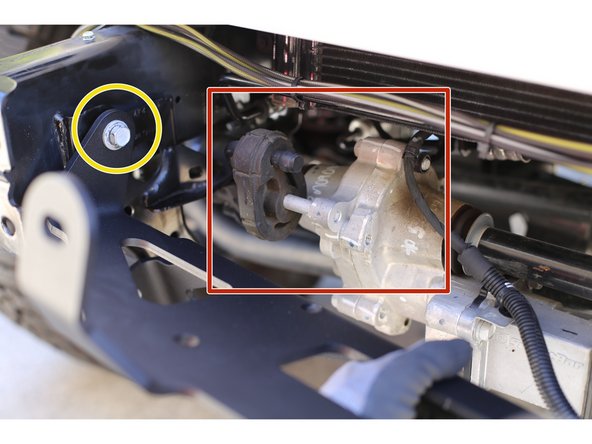
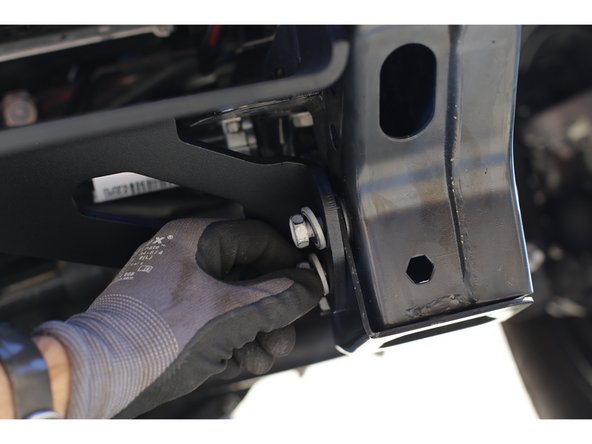
Using a 16mm socket remove the bolt on the inside of each frame rail that holds on the bumper mount support. Place the bumper mount supports close by, they will be re-used.
-
Apply threadlocker to the six provided M10x1.5 x 35mm bolts.
-
-
-
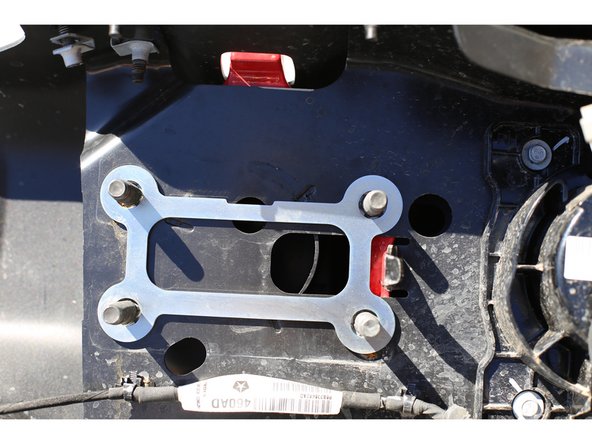
Orient the Grimm OffRoad Winch Plate in between the frame rails as shown and temporarily secure with a factory bolt removed in the previous step threaded through a upper ear into the side of the frame.
-
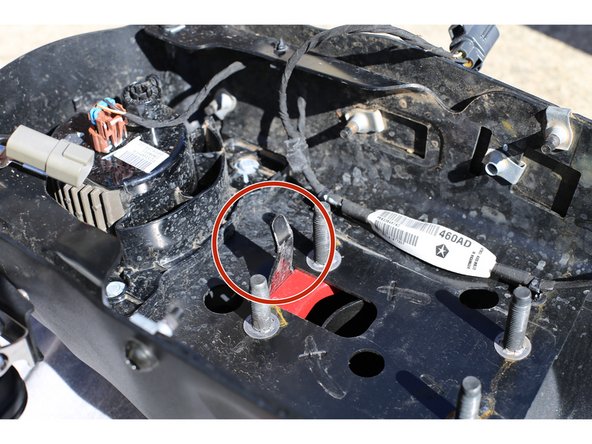
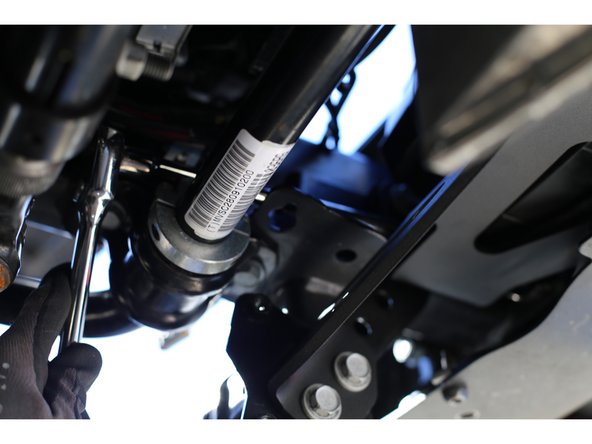
Note the orientation of the sway bar disconnect motor if equipped. The motor hanger/isolator must be oriented hanging down as shown. Some vehicles come with the motor hanger/isolater over-centered towards the vehicle and this needs to be corrected for the winch plate to properly fit.
-
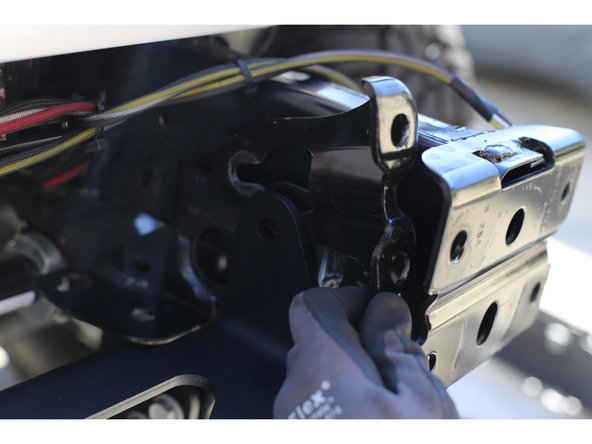
Insert the factory skid plate mounting plate in between the frame and the Winch Plate and thread the provided M10x1.5 x 35mm bolts through both holes. Repeat on the other side of the frame.
-
Leave hardware loose at this point.
-
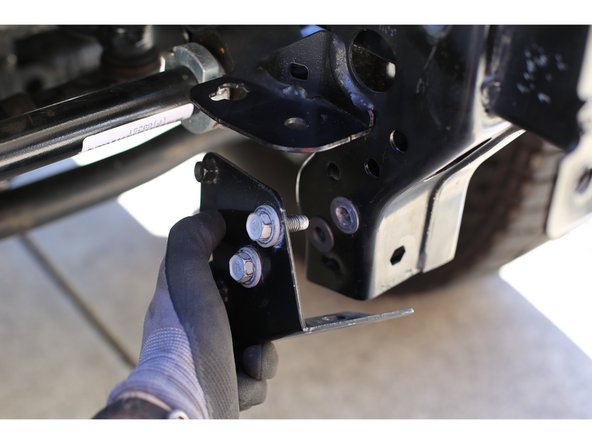
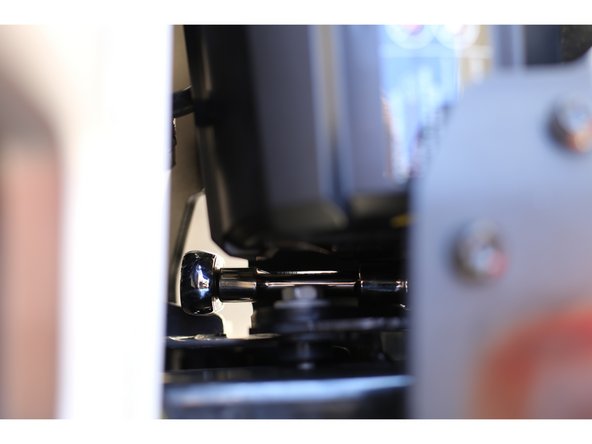
If the Jeep does not have all of the required rivet nuts installed (Some non-Rubicons), we provide 4 rivet nuts that will need to be installed now. They can be installed with the provided 12mm hex nut and one of the M10x1.5 hex head screws.
-
Put the 12mm hex nut on the M10x1.5 hex head screw and thread into the rivet nut. With the rivet nut flush against the frame and a wrench holding the 12mm nut, tighten the M10x1.5 hex head screw until the rivet nut has full expanded into the frame and then remove the screw and nut.
-
-
-
Remove the upper bolt that was temporarily installed to hold the Winch Plate in place.
-
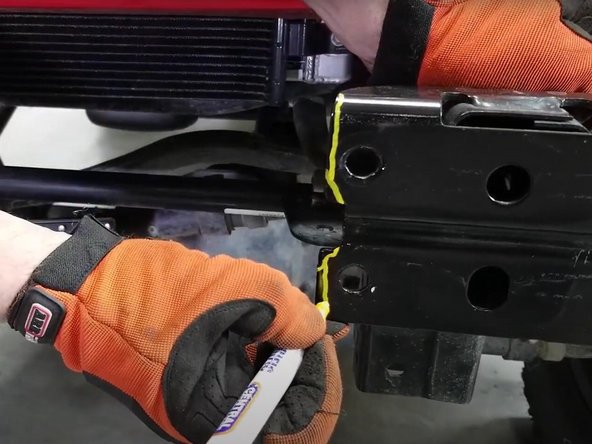
Insert a bumper mount support between the frame and the Grimm Winch Plate and install an M10x1.5 x 35mm bolt. Repeat on other side of frame.
-
Make sure the skid plate mounting plates are correctly positioned and pushed up against the frame horns. Snug up lower mounting hardware.
-
Make sure the bumper mount supports are correctly positioned and pushed all the way forward against the bumper mounting plates and the holes are lined up.
-
Torque all 6 pieces of hardware to 45 lb-ft [61 Nm] with a 15mm socket.
-
-
-
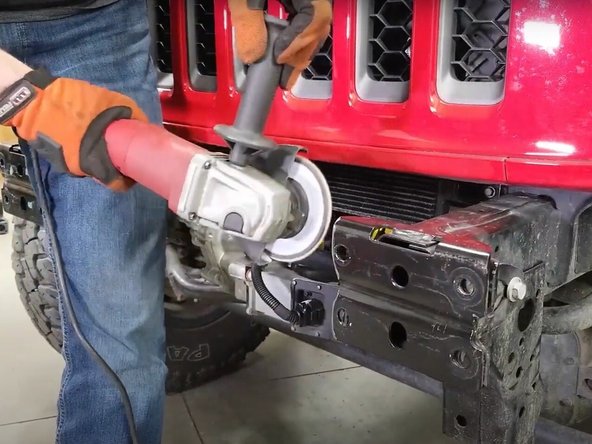
Depending on the winch being used, the bumper mounting plates may need to be trimmed slightly for the winch to fit.
-
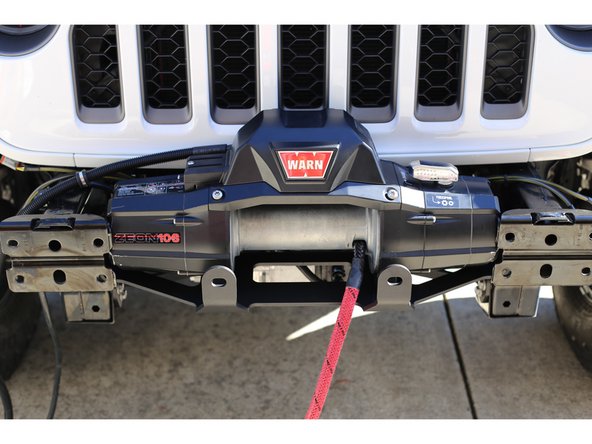
Set the winch on the winch plate and install the hardware loosely. For most winches you will want the winch centered and pulled all the way forward. Torque hardware according to the manufacturer's instructions.
-
We recommend installing the winch rope/cable before installing the bumper so that there is more room to work. It can be helpful to spool most of the cable/rope at this point in order to ease installation. The cable/rope must be correctly re-spooled after installation is complete.
-
-
-
If the winch rope/cable has been installed on the winch drum, place the bumper close to the front of the vehicle and thread the rope/cable through the hole in the front bumper before installing the bumper.
-
Re-install the front bumper on the vehicle. Make sure the bumper is fully seated against the mounting plates on the frame, and loosely install a couple of the factory nuts so that the bumper cannot come off.
-
Hand tighten the nuts on the backside of the bumper. It can be helpful to move the bumper slightly to gain access to the studs. It is easier to get the inside lower nuts on from below the vehicle.
-
Tighten the bumper mounting nuts. The inside upper nuts are best tightened with a short extension and a deep socket from the top. The inside lower nuts can be accessed from underneath, with a short extension on the passenger side and a long extension on the driver side.
-
The outer bumper mounting nuts are easily accessed with a deep socket and short extension from the sides of the bumper.
-
Torque factory bumper mounting hardware to 67 lb-ft [90 Nm].
-
-
-
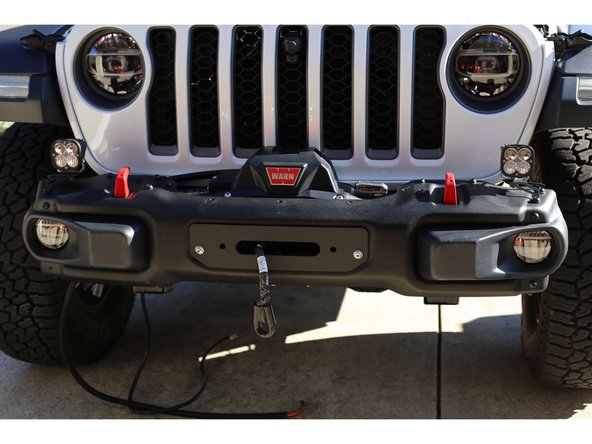
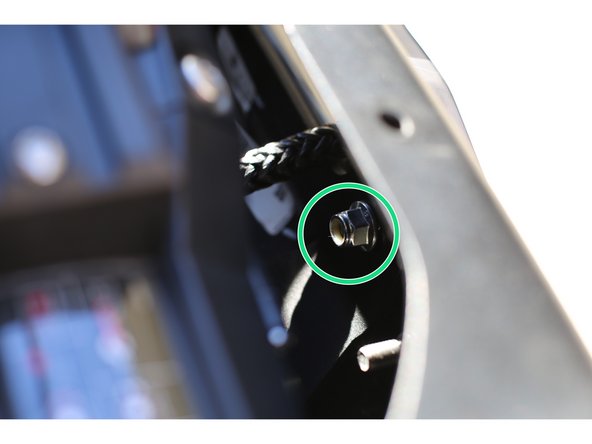
Thread the winch rope/cable though the chosen fairlead. Using one of the provided M10-1.50 x 50mm stainless button head screws with a washer under the head, place the bolt though the fairlead, Fairlead Plate, front bumper, and Winch Plate. Use a provided flange nut on the backside. Tighten the nut one or two turns only at this time.
-
Repeat above step on the other side of the fairlead.
-
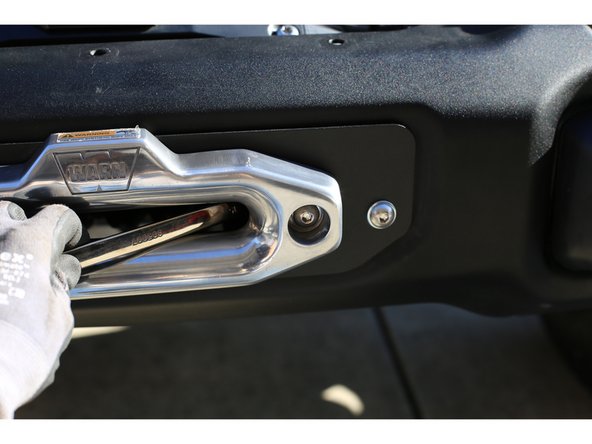
With both pieces of hardware installed with the fairlead, orient the fairlead so the slot in the fairlead lines up with the slot in the bumper and is pushed up as high as it will go.
-
A wrench can be fed through the fairlead opening and used to hold the nut on the backside as the hardware is torqued.
-
Using an M6 allen key and 15mm wrench, torque hardware to 40 lb-ft [54 Nm].
-
-
-
Run winch wiring to the vehicle battery per winch manufacturer's instructions.
-
Spool or re-spool the rope/cable on the winch drum. We recommend using two vehicles, and lightly setting the parking brake on the Jeep to provide tension while spooling the line.
-
Re-connect factory fog light connector and any other lights.
-
We recommend checking hardware torque after the first time the winch is used offroad.
-