
Introduction
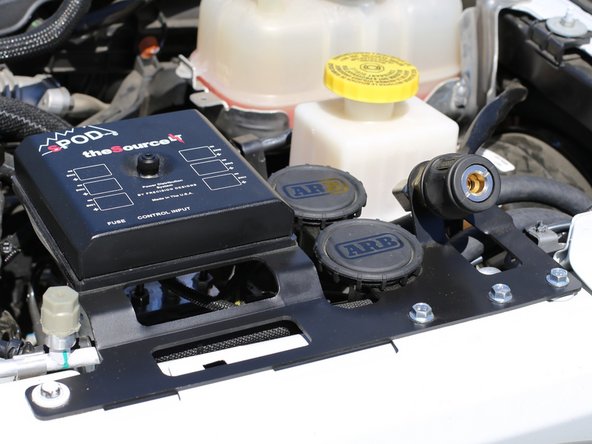
This guide will walk through the correct installation procedure for the Grimm OffRoad JL and JT ARB Brushless Twin Compressor sPOD Bracket. Because this compressor mounting bracket is compatible with both the ARB Brushless Twin Compressor (CKBLTA12) and Standard Twin Compressor (CKMTA12), not all provided parts are used for both compressors. Pay careful attention to the installation instructions and make sure you are following the correct installation steps for the compressor you are installing. When an ARB Twin Compressor is in use, it is always recommended to leave the engine running.
Consumer Warning
All Grimm OffRoad products must be installed by a competent and qualified individual in accordance with the installation instructions intended for the product. Incorrectly installed products will void any warranties and may result in damage to the product or damage to the vehicle it was installed on. Read any provided instructions or guides and watch any available videos before attempting installation. If there are any questions, please contact Grimm OffRoad before starting installation.
Many products require the vehicle be properly raised and supported off the ground. The installer is responsible for confirming that this may be done in a safe manner and the correct equipment is available to perform the installation. Grimm OffRoad installation instructions assume the installer is able to properly and safely lift the vehicle.
Vehicles that have been modified will not perform the same as a stock vehicle. It is incumbent upon the owner of the vehicle to be aware of the differences the modifications will make to the driving characteristics of the vehicle. These may include (but are not limited to): changes in handling, braking, rollover angle, incompatibilities with the factory anti-lock braking systems, stability control systems, or traction control systems.
Supporting Parts
This Grimm OffRoad product is designed to be used in conjunction with an ARB Brushless Twin Compressor (Specifically the CKBLTA12), but can also be used with ARB's Standard Twin Compressor (CKMTA12). An air hose kit is also required to have a fully functioning air system. We recommend the Grimm OffRoad GOR10743 Air Hose Kit. It is important to review and familiarize yourself with the instructions provided with the compressor before beginning installation.
Tools
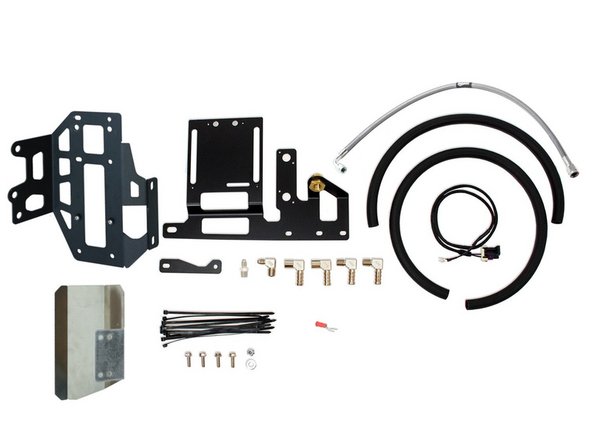
Parts
- Control Panel
- Heat Shield
- Compressor Mounting Plate
- Spacer Plate
- Air Filter Relocation Hose (Long)
- Air Filter Relocation Hose (Short)
- High Pressure Stainless Steel Air Line
- Long Control Harness (CKMTA12 Only)
- Spade Terminal, #6
- Male Air Filter Relocation Fitting × 2
- Female Air Filter Relocation Fitting × 2
- 1/4” NPT x JIC4 90° Elbow
- 1/4” NPT x JIC4 Straight
- M6x1.0 20mm Long Hex Screw × 4
- M6x1.0 Nylock Flange Nut
- 5/16 Flat Washer
- Zip Tie × 10
-
-
Verify that all parts shown in the picture are present.
-
If using the ARB CKBLTA12 Brushless Twin Compressor, ring terminals are provided by ARB to connect the ARB Brushless Twin Compressor to the vehicle's battery.
-
If using the ARB CKMTA12 Twin Compressor, three 6 gauge M8 stud size ring terminals are required to connect the ARB Twin Compressor to the vehicle's battery.
-
-
-
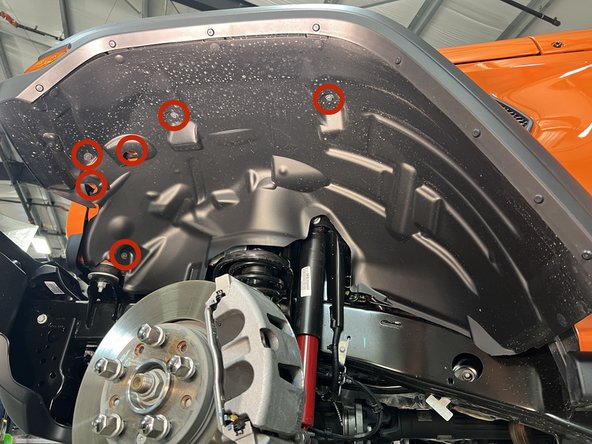
Remove the hardware securing the inner fender liner with a 10mm socket. One of these may be a push pin on some models.
-
Start at one end of the fender flare and pull out, away from the vehicle (pull hard!) to remove the fender flare.
-
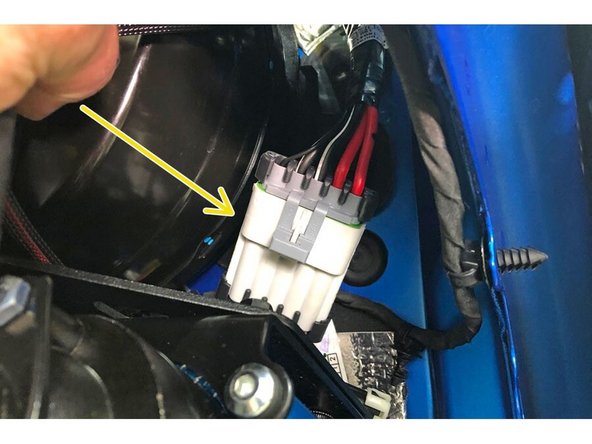
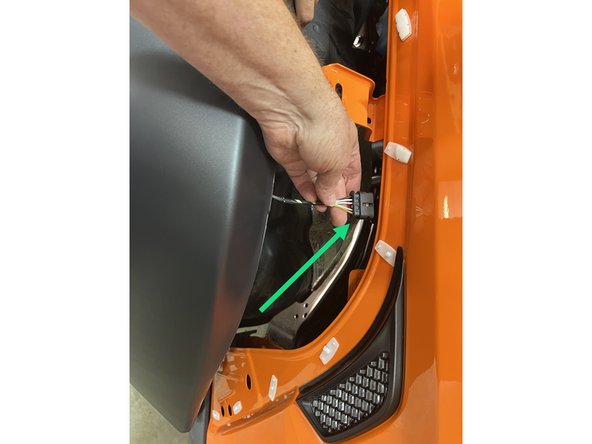
Disconnect the side marker light wire harness by first pulling the red tab out, then separating the connectors.
-
There are ten retaining clips on the backside of the flare. These clips may be damaged during disassembly. Replacement clips are available, Mopar part number 68526185AA.
-
-
-
This step pertains to the 3.6L Pentastar engine only. Skip to Step 4 if you have the 2.0L Turbo engine.
-
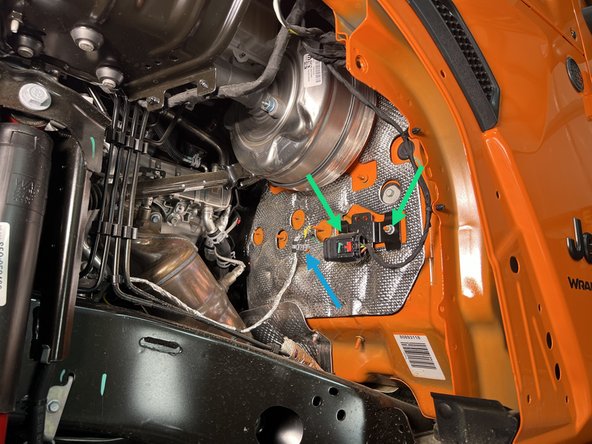
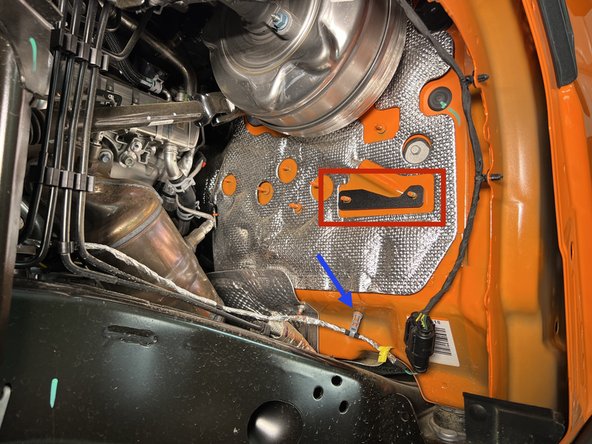
Remove the two nuts holding the wheel sensor plug bracket to the firewall with a 10mm socket or wrench. Save the nuts as they will be used later.
-
Pull the wire harness retainer off the stud.
-
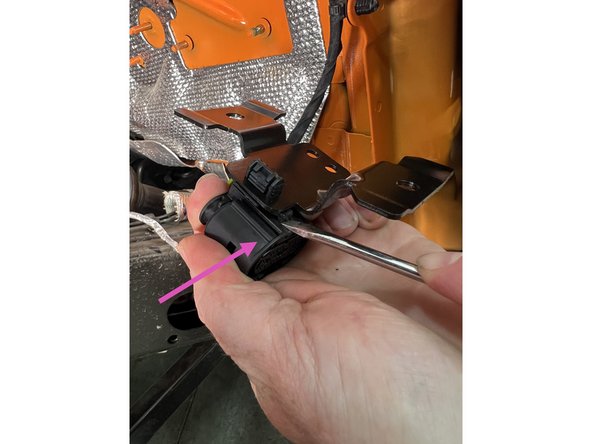
Use a flat blade screwdriver to separate the bracket from the plug.
-
Discard the wheel sensor plug mounting bracket
-
Relocate the wire harness retainer to the stud below the silver heat shielding.
-
Install the Grimm OffRoad Spacer Plate on the mounting bracket studs as shown.
-
-
-
This step pertains to the 2.0L Turbo engine only. Skip to Step 5 if you already completed Step 3.
-
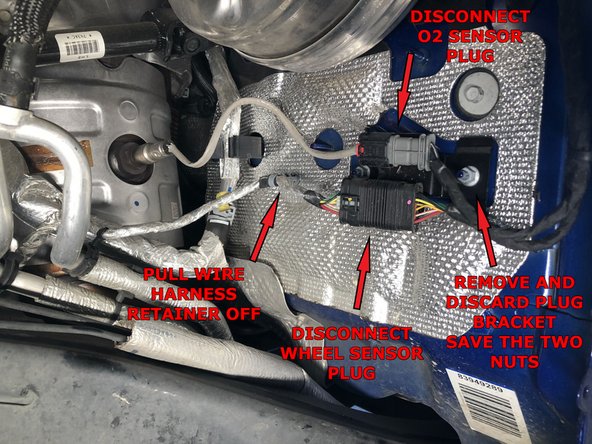
On the firewall, disconnect the wheel sensor and O2 sensor plugs.
-
Remove the two nuts holding the plug bracket with a 10mm socket or wrench. Save the nuts, as they will be used later. Discard the plug mounting bracket.
-
Cut the zip-tie holding the wire harness to the stud directly under the brake booster. Pull the wire harness retainer off the stud and discard.
-
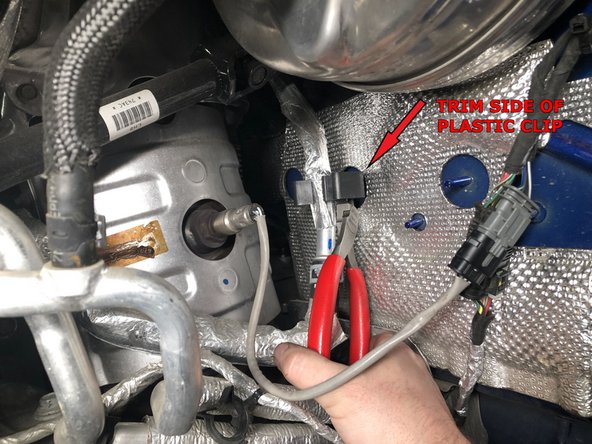
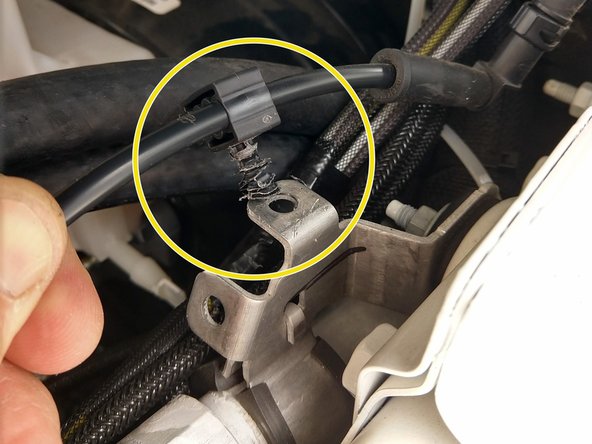
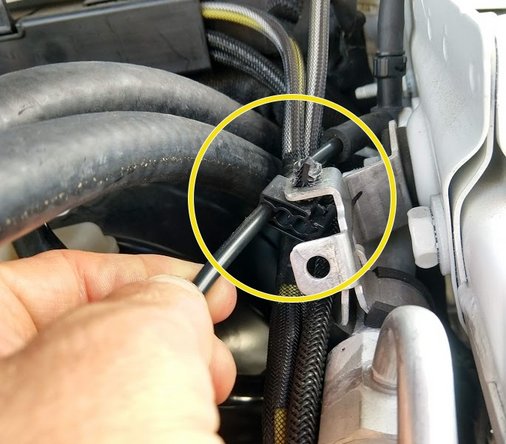
Trim the plastic clip that holds that coolant line against the firewall. This clip will interfere with the compressor's heat shield if not removed.
-
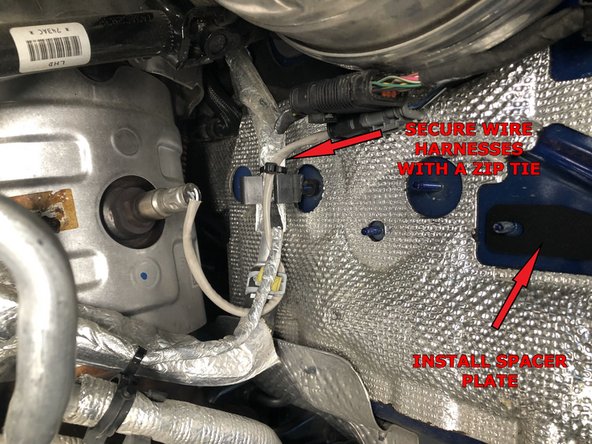
Use a new zip tie to secure the two wire harnesses to the coolant line as shown.
-
Install the Grimm OffRoad Spacer Plate on the mounting bracket studs as shown.
-
-
-
The following steps are for the ARB CKBLTA12 Brushless Twin Compressor. If you are installing the ARB CKMTA12 Twin Compressor, skip to Step 8.
-
Follow the ARB Brushless Twin Compressor (CKBLTA12) instructions to get the compressor clamping mechanism adjusted and setup for use.
-
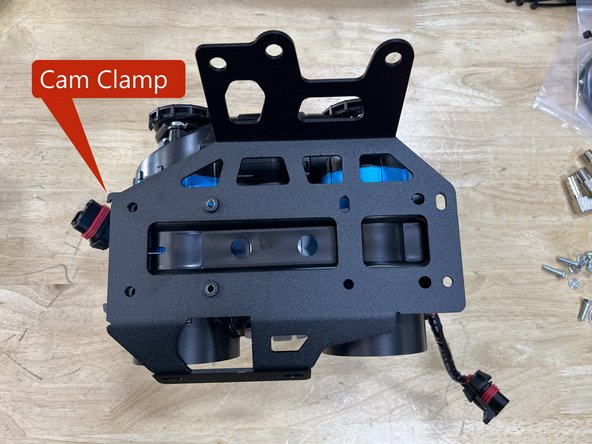
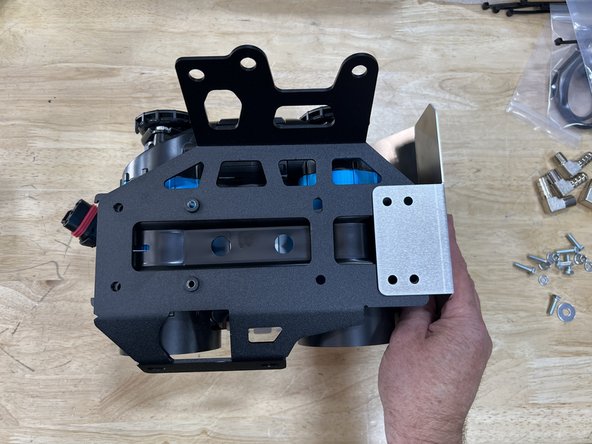
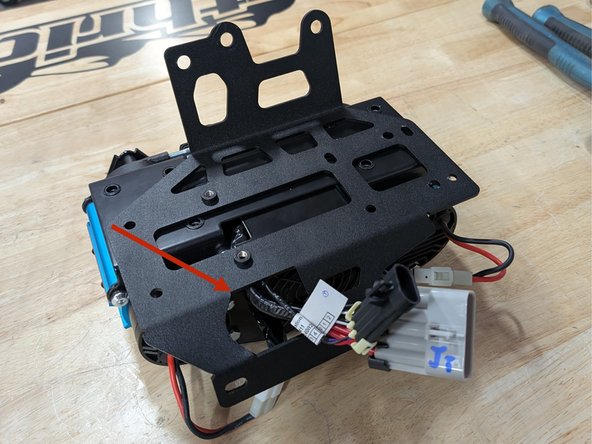
With the compressor oriented as shown with the compressor mounting holes facing up, the ARB mounting bracket should be positioned with the cam-clamp on the left. Orient the Grimm OffRoad Compressor Bracket and heat shield into the Compressor as shown.
-
Remove the compressor from the ARB mounting bracket by loosening the cam-clamp on the side of the compressor.
-
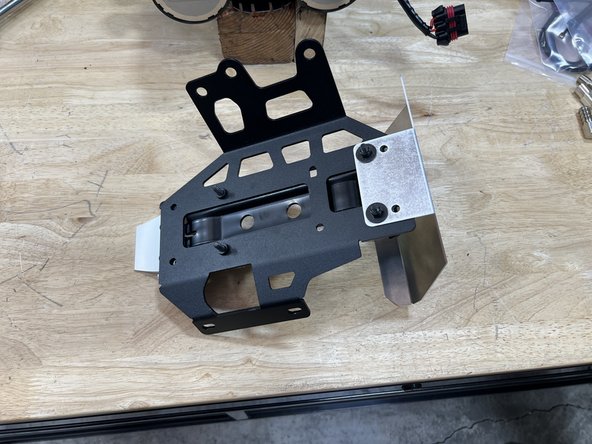
Secure the Grimm OffRoad compressor bracket and heat shield to the ARB mounting bracket.
-
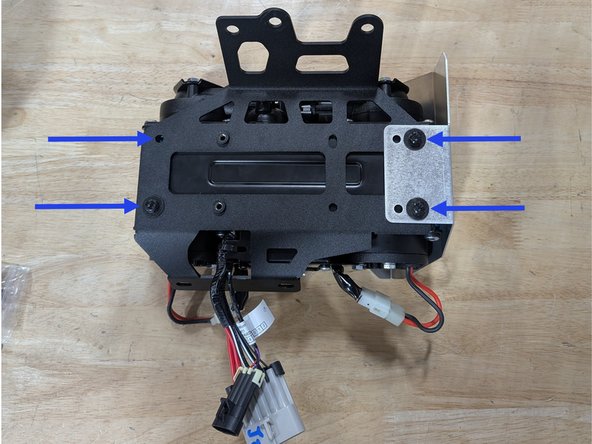
Use 2 of the ARB provided screws, washers, and Grimm OffRoad provided M6 nylock flange nuts to secure the end of the compressor bracket with the heat shield to the ARB mounting bracket.
-
The other end of the Grimm OffRoad compressor bracket has PEM nuts installed and needs just 2 of the ARB provided screws and washers to secure the ARB mounting bracket to it.
-
Torque mounting hardware to 5 lb-ft [6 Nm].
-
-
-
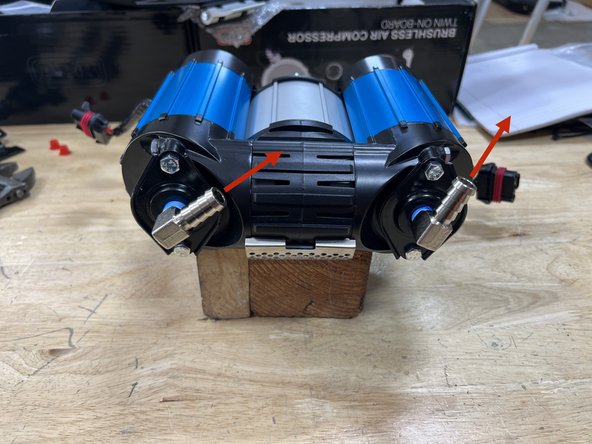
Install the two 1/4” NPT x 1/2” barb 90° fittings into the inlet ports on the ARB Twin Compressor. Use thread sealant on the NPT threads and clock the barb fittings as shown in the picture.
-
Note that NPT fittings are tapered fittings and must not be overtightened. If you can't get the fittings to point the correct direction, it is recommended to remove, use a couple additional wraps of Teflon tape, then reinstall.
-
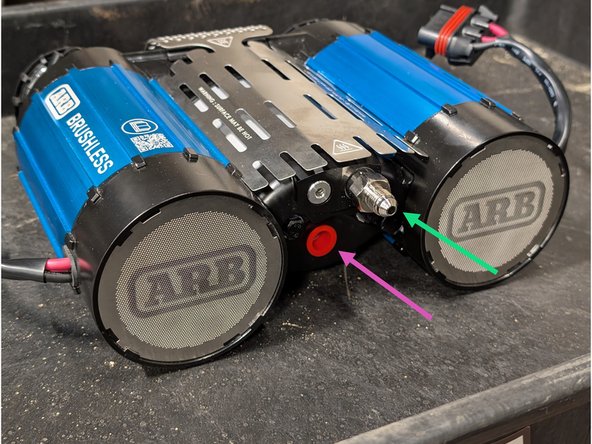
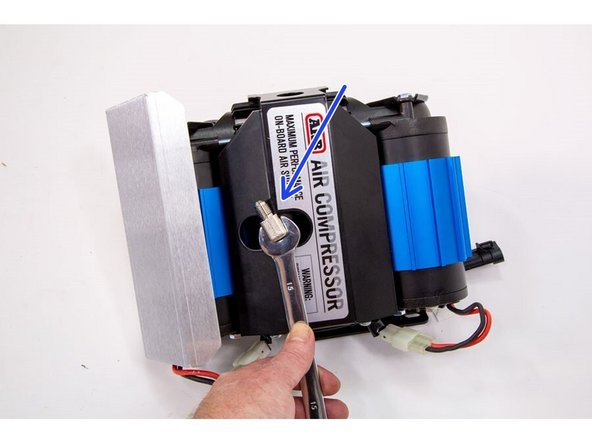
Install the ARB provided 1/4” NPT x JIC4 straight fitting into the outlet port of the ARB compressor. Make sure to use thread sealant on the NPT thread.
-
Follow ARB's instructions to install the ARB provided pressure regulator in the red capped-off port.
-
-
-
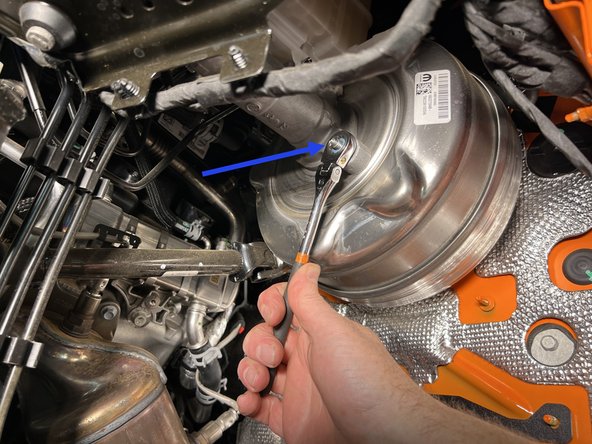
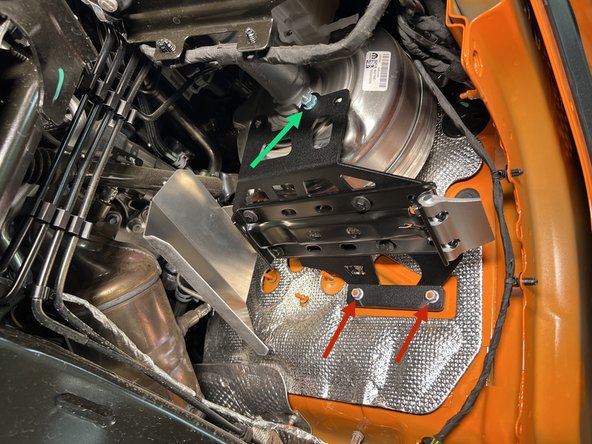
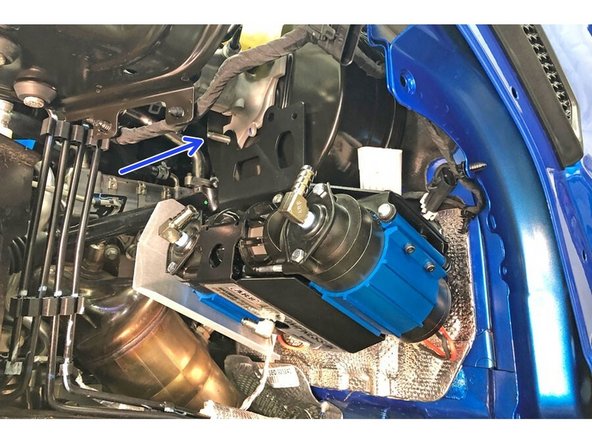
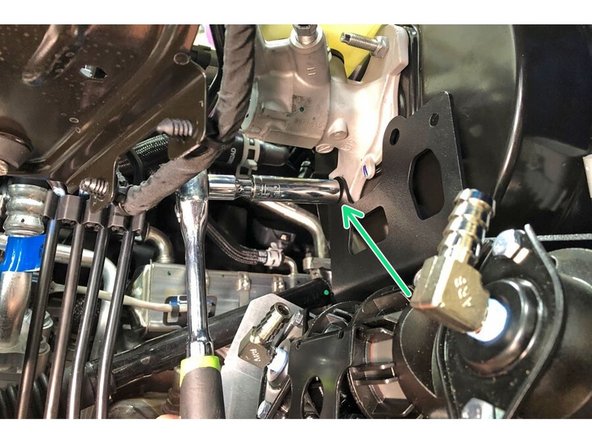
Remove the lower master cylinder nut with a 13mm socket or wrench and install the mounting bracket assembly onto the lower MC stud and the two firewall studs with the previously installed Grimm OffRoad spacer.
-
Wrangler and Gladiator models will use different mounting bracket holes for the lower MC stud. The extra bolt holes provided in the top of the compressor bracket allow mounting of an ARB Manifold (Part # ARB171503), allowing the connection of multiple air lockers to a single compressor. Additional wiring is required.
-
Reinstall the OE nuts onto the firewall studs to secure the bottom of the Grimm OffRoad compressor mounting bracket.
-
Torque with a 10mm wrench to 8 lb-ft [11 Nm].
-
Reinstall the lower master cylinder nut.
-
Torque with a 13mm wrench to 13 lb-ft [18 Nm].
-
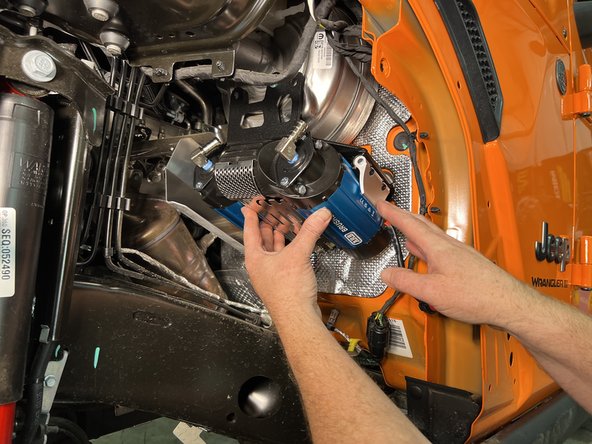
Install the ARB CKBLTA12 Brushless Twin Compressor and tighten in place with the cam-clamp.
-
Skip to step 11.
-
-
-
The following steps are for the ARB CKMTA12 Twin Compressor. If you already installed the ARB CKBLTA12 Brushless Twin Compressor, skip to Step 11.
-
With the mounting holes of the ARB Twin compressor facing up, set the Grimm OffRoad Compressor Bracket onto the Compressor, sliding the wiring harness though the large hole in the bracket as shown.
-
Position the Grimm OffRoad Heat Shield on to the right hand side of the compressor and use the four ARB screws and washers that came with the compressor to secure the compressor to the bracket.
-
Torque mounting hardware to 5 lb-ft [6 Nm].
-
-
-
Install the two 1/4” NPT x 1/2” barb 90° fittings into the inlet ports on the ARB Twin Compressor. Use thread sealant on the NPT threads and clock the barb fittings as shown in the picture.
-
Install the 1/4” NPT x JIC4 90° fitting into the outlet post of the ARB compressor. Make sure to use thread sealant on the NPT thread and orient the fitting as shown.
-
Note that NPT fittings are tapered fittings and must not be overtightened. If you can't get the fittings to point the correct direction, it is recommended to remove, use a couple additional wraps of Teflon tape, then reinstall.
-
-
-
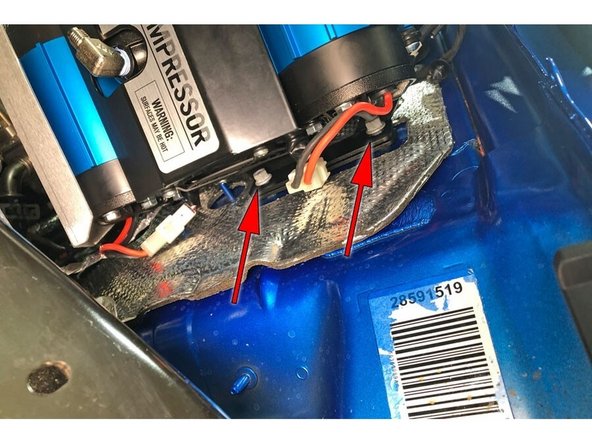
Install the compressor assembly onto the lower MC stud and the two firewall studs with the previously installed Grimm OffRoad spacer.
-
Wrangler and Gladiator models will use different mounting bracket holes for the lower MC stud.
-
The extra bolt holes provided in the top of the compressor bracket allow mounting of an ARB Manifold (Part # ARB171503), allowing the connection of multiple air lockers to a single compressor. Additional wiring is required.
-
Reinstall the OE nuts onto the firewall studs to secure the bottom of the Grimm OffRoad compressor mounting bracket. There is not much clearance, you will need to pull the compressor bracket away from the firewall about 1/4” to get the nuts on. Tighten with 10mm wrench.
-
Torque to 8 lb-ft [11 Nm].
-
Reinstall the lower master cylinder nut.
-
Torque to 13 lb-ft [18 Nm].
-
Skip to Step 13.
-
-
-
The following steps are for the ARB CKBLTA12 Brushless Twin Compressor. If you are installing the ARB CKMTA12 Twin Compressor, skip to Step 13.
-
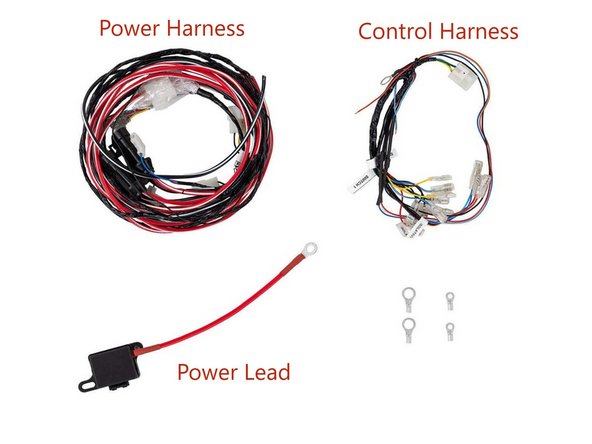
The ARB CKBLTA12 Twin Compressor comes with two wire harnesses and a power lead. The thicker harness is the main power harness and will be used to power the compressor. The other harness is the control harness and will not be needed for this installation.
-
It will be necessary to detach the compressor from the ARB compressor mount to attach the wiring and air hose.
-
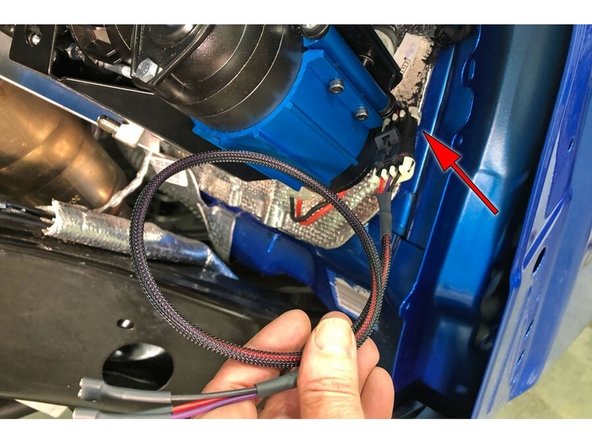
Plug the ARB power harness into the matching plugs on the ARB compressor, including the pressure regulator, route the wire up over the brake booster and along the firewall to the battery. Connecting the power terminals will be covered later.
-
The ARB compressor can be reattached to its mounting bracket now.
-
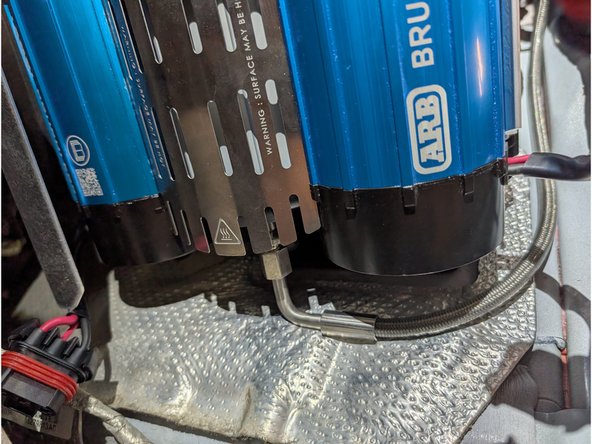
The air hose can also be connected to the compressor at this time. Install the 90 degree end of the included Stainless Steel Pressure Hose on to the previously installed fitting on the compressor and route as shown.
-
-
-
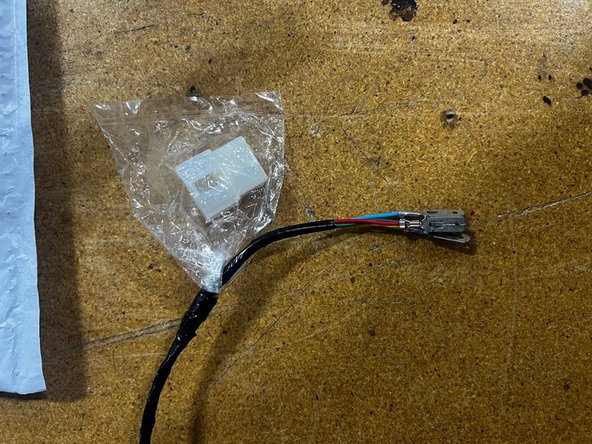
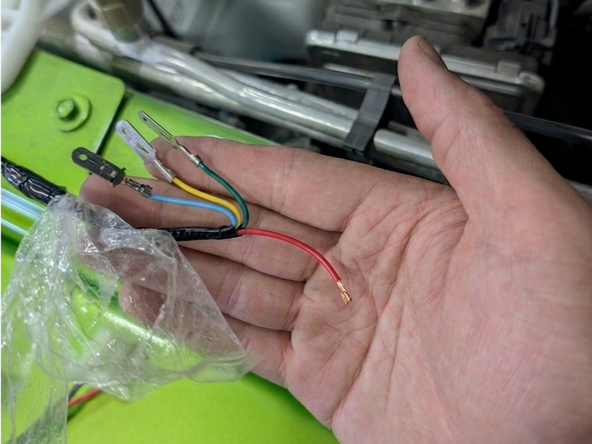
On the ARB power harness coming from the compressor, there should be a white connector housing in a bag attached to some male spade connectors. We are going to use only the red wire from the ARB power harness. The white connector and other wires are not needed.
-
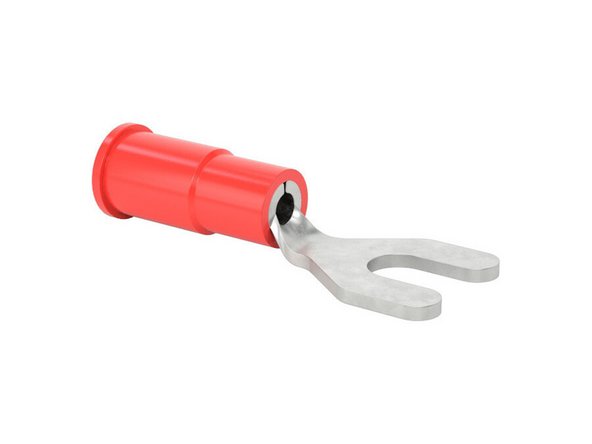
Cut off the terminal from the red wire, strip the wire, and crimp the Grimm OffRoad supplied spade terminal to the red wire.
-
Skip to Step 15.
-
-
-
This step is for the ARB CKMTA12 Twin Compressor. If you are installing the ARB CKBLTA12 Brushless Twin Compressor, skip to Step 15.
-
The ARB CKMTA12 Twin Compressor comes with two wire harnesses. The thicker harness with the fuse blocks is the main power harness and will be used to power the compressor. The other harness is the control harness and is replaced by the included Grimm OffRoad control harness.
-
Plug the supplied Grimm OffRoad long control harness into the smaller of the two ARB Air Compressor plugs.
-
Plug the ARB power harness into the matching plug on the ARB compressor, route the wire up over the brake booster, along the firewall to the battery. Use zip ties to anchor the wire harness along the firewall. Connecting the power terminals will be covered later.
-
The air hose can also be connected to the compressor at this time. Slide the air fitting threaded cover onto the hose, push the hose onto the barbed air fitting already installed on the compressor, and then tighten the cover by hand.
-
-
-
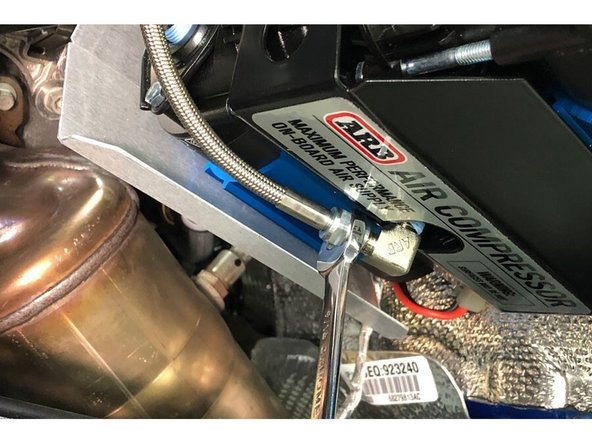
Install the straight end of the included Stainless Steel Pressure Hose on to the previously installed fitting on the compressor and route the other end up to the top of the fender.
-
The Stainless Steel Pressure Hose uses flared fittings and does not need any type of thread sealant.
-
-
-
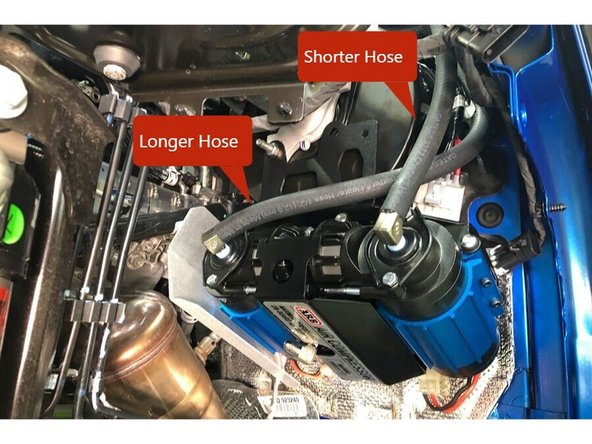
Install the supplied filter relocation hoses onto the barb fittings on the compressor. The longer of the two hoses connect to the innermost fitting, the shorter connects to the outer fitting.
-
These lines simply press-on and do not need any additional clamps.
-
Route the air hoses up between the brake booster and the inner fender structure.
-
-
-
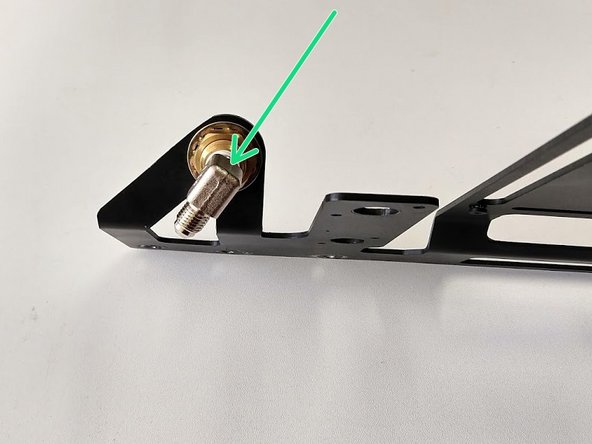
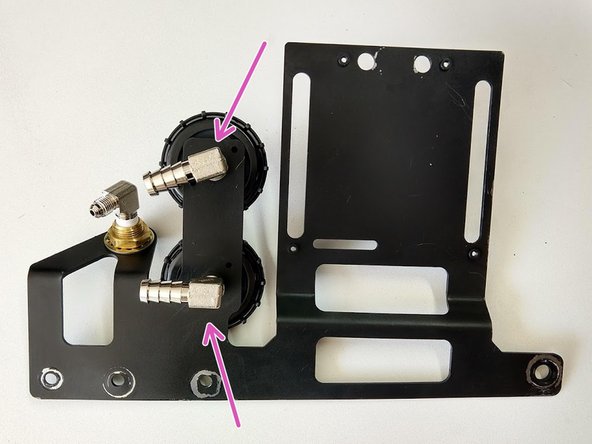
Install the 1/4” NPT x JIC4 90° elbow into the back of the bulkhead fitting on the controls plate using a 14mm wrench. Use thread sealant on the NPT threads and match the alignment of the fitting to the picture.
-
If installing the CKMTA12 compressor, the 1/4" NPT x JIC4 straight fitting will be used here instead.
-
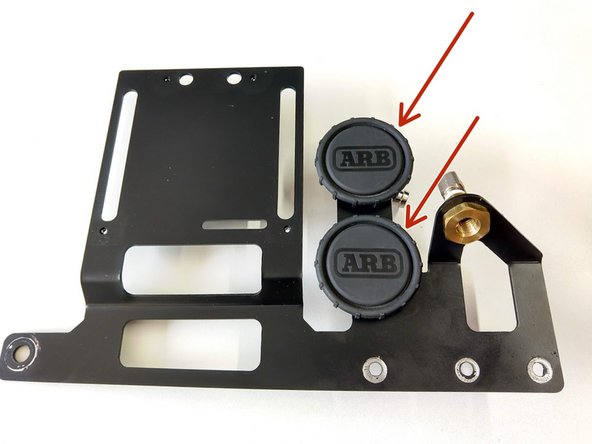
Install the ARB Compressor Filters on to the leg of the controls plate as shown.
-
Thread the two 90 degree female 1/4” NPT x barb fittings onto the ARB filter nipples and tighten by hand. Match the alignment of the barbed fittings as shown in picture above.
-
The ARB filter housing is plastic; the threads can strip out easily. DO NOT OVER-TIGHTEN!
-
-
-
This step pertains to the 2.0L Turbo engine only. Skip to Step 18 if you are installing on the 3.6L engine.
-
The 2.0L Turbo engine has a mini fuse/relay box that needs to be relocated to make room for the Grimm OffRoad Control Panel.
-
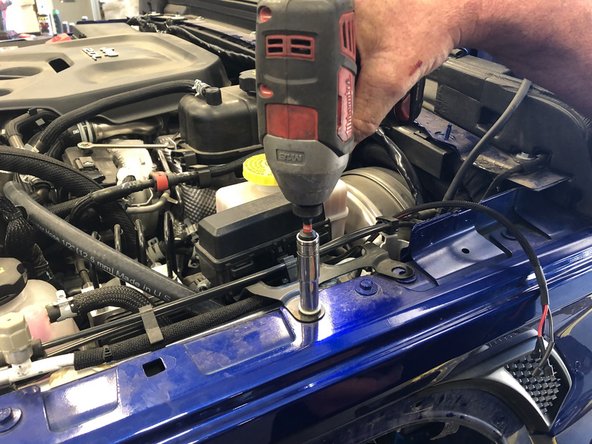
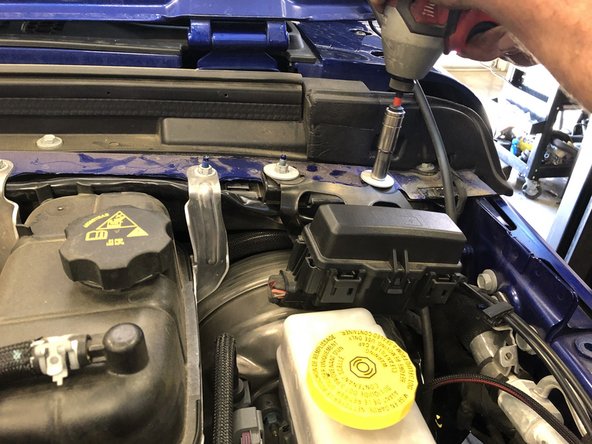
Remove the painted fender bolt and both bolts securing the fuse/relay box with a 10mm wrench/socket.
-
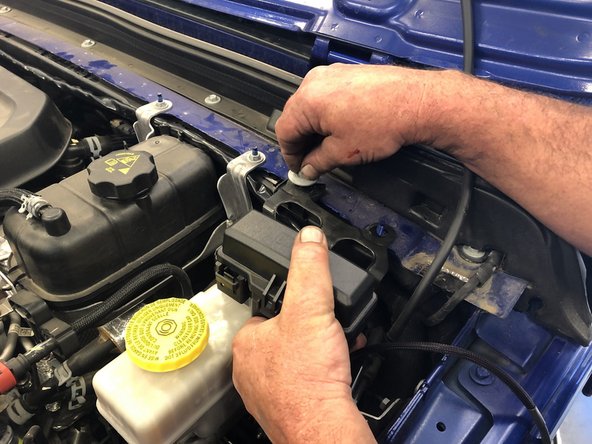
Relocate the fuse/relay box up above the brake booster and secure with the existing flanged nut and the M6 x 1.0 included flange nut.
-
Use a 10mm socket/wrench to torque hardware to 7 lb-ft [9 Nm].
-
The fuse/relay box mounting bracket may need to be bent down slightly to prevent any interference with the hood when closed.
-
-
-
The clip on the fender holding the washer line needs to be flipped upsidedown, to the other side of the bracket as shown.
-
-
-
The 3.6 V6 engine needs to have a wiring harness moved before installing the controls plate. Skip to Step 20 if you are installing on the 2.0L engine.
-
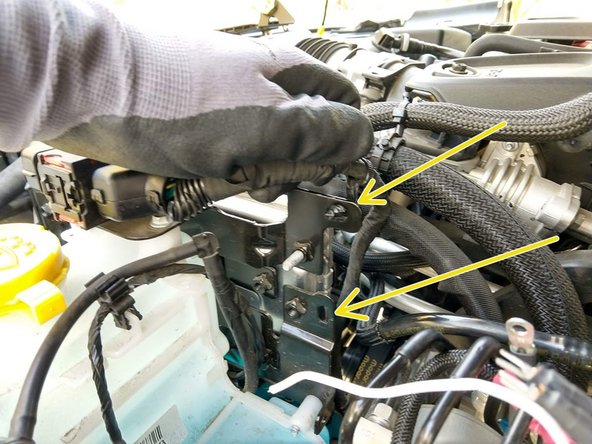
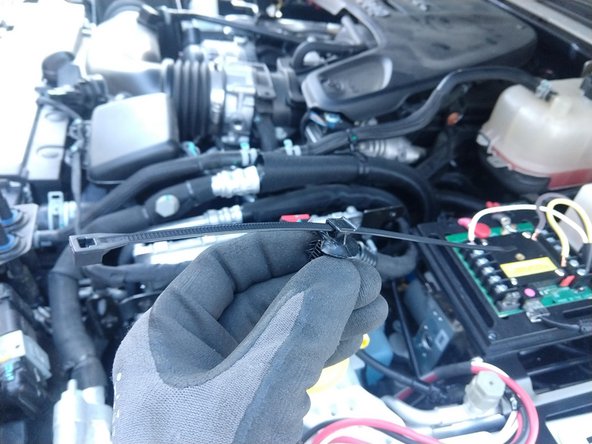
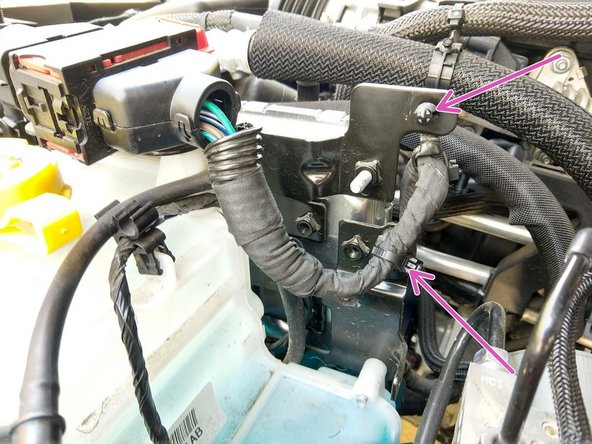
Remove the two harness clips shown. Clip the zip ties securing the harness to the clips.
-
Install new zip ties through the clips, and install the clips back as shown.
-
Secure the harness with the zip ties as shown. Make sure the harness cannot rub on any metal brackets.
-
-
-
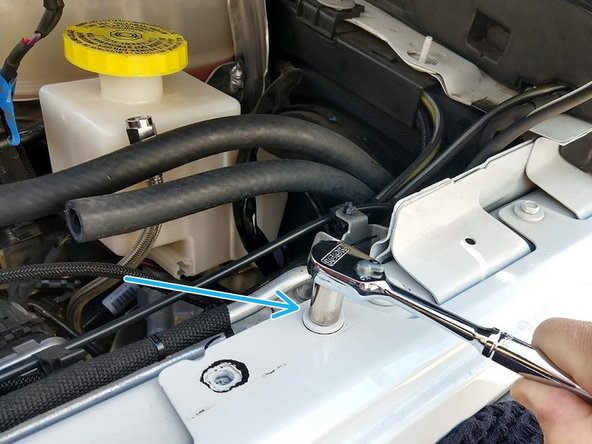
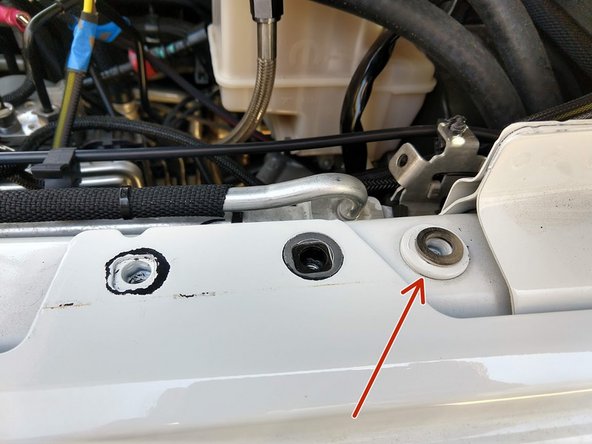
Remove the fender bolt shown with a 10mm wrench/socket.
-
Place the provided 5/16" flat washer over the hole to the right of the fender bolt removed.
-
Push air filter relocation hoses from the compressor onto the barb fittings on the back side of the air filters.
-
Install the Grimm OffRoad Control Panel using two of the provided M6 bolts and washers and the previously removed OEM fender bolt.
-
Use a 10mm socket/wrench to torque hardware to 7 lb-ft [9 Nm].
-
-
-
Install the other end of the included Stainless Steel Pressure Hose on to the brass bulkhead fitting on the Controls Plate.
-
If using the CKMTA12 compressor, you will connect the 90 degree end of the hose to the straight fitting at the brass bulkhead fitting.
-
The Stainless Steel Pressure Hose uses flared fittings and does not need any type of thread sealant.
-
Install a 1/4" NPT male air coupling of preference (not included, we recommend Grimm OffRoad Air Hose Kit GOR10743 which includes an NPT air coupling). Make sure to use thread sealant on the NPT threads.
-
-
-
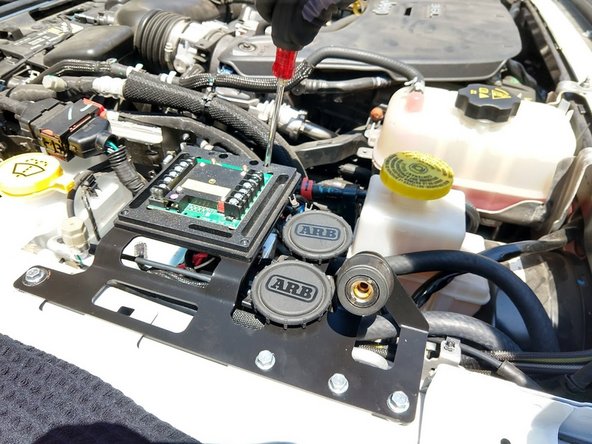
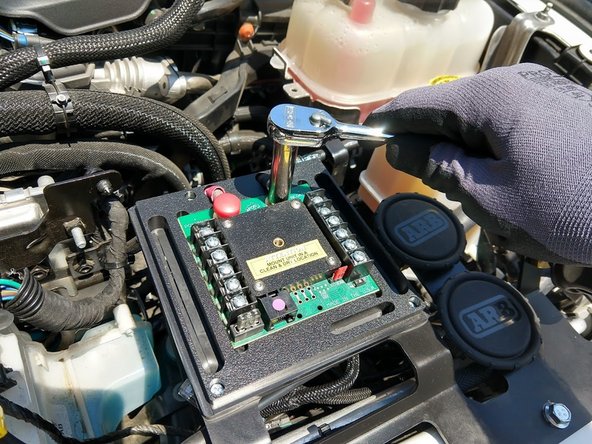
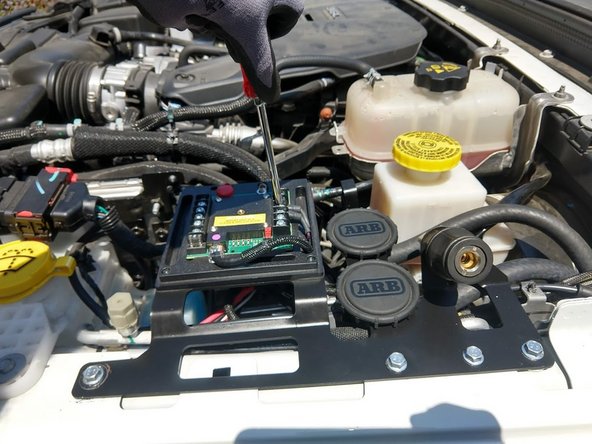
Place the sPOD gasket down first, then the Module, and tighten the mounting screws with a #2 phillips screwdriver.
-
Connect the power wires to the sPOD module, noting that the circuit breaker is installed at the battery end. Use a 3/8" socket or wrench to tighten.
-
-
-
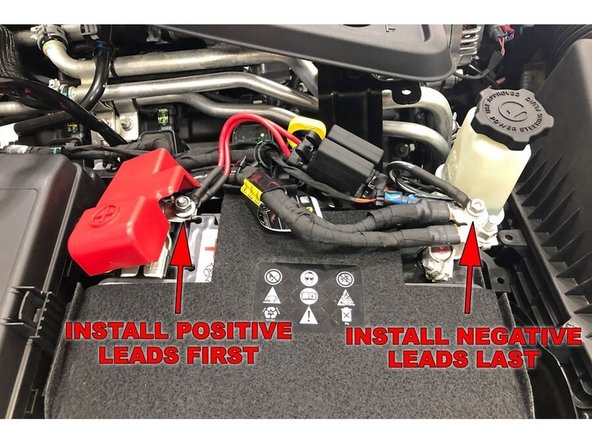
Connect the ARB compressor harness power leads directly to the battery according to the ARB Twin Compressor Installation Guide.
-
For the ARB CKMTA12 compressor, three 6 gauge M8 stud size ring terminals are needed to connect the ARB Twin Compressor Harness to the battery terminal ends. M8 ring terminal ends are required and do not come with the ARB compressor harness.
-
Connect the sPOD leads directly to the battery according to the sPOD Installation Guide.
-
-
-
(CKMTA12 compressor only) - Run the Grimm OffRoad supplied compressor switch wire harness up through the gasket and connect to switch number of choice on the sPOD module. Black wire to GND, purple wire to SW.
-
(CKBLTA12 compressor only) - Run the red wire we installed the spade terminal to on the ARB power harness up through the gasket and connect to switch number of choice on the sPOD module. Red wire to SW.
-
Install the sPOD control panel in the Jeep, and install the control wire from the sPOD control panel to the sPOD module.
-
Connect any other accessories to the sPOD module.
-
-
-
After the sPOD install has been completed, start the vehicle and turn on the compressor using the sPOD control panel. The compressor should turn on for a short period of time then turn off. If it doesn't, spraying the air connections with soapy water can help identify any leaks.
-
The fan on the ARB Twin Compressor will continue to run until the switch is turned off.
-
-
-
Re-install fender flare, replacing any retaining clips broken during removal.
-
Reconnect the side marker light wire harness connector and push the red locking tab in.
-
Re-install the five screws using a 10mm socket/wrench and press the push pin back into place.
-
Torque hardware to 7 lb-ft [9 Nm].
-





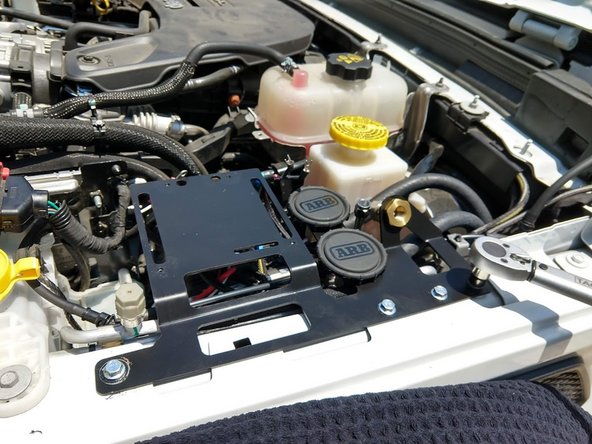
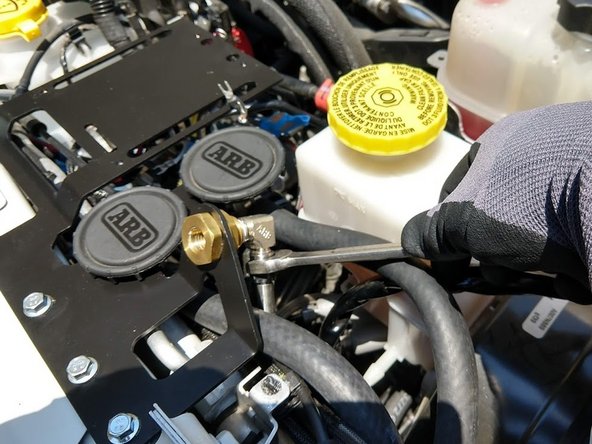
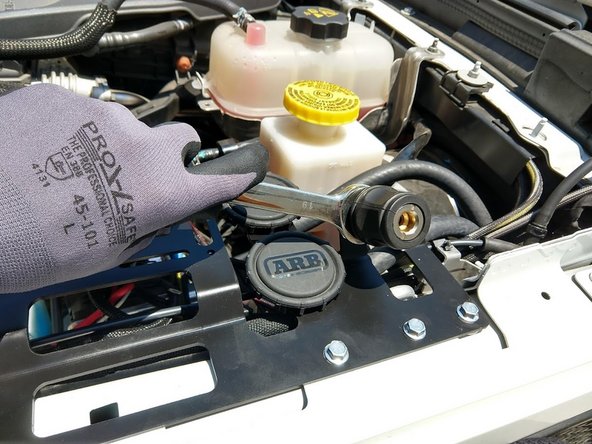
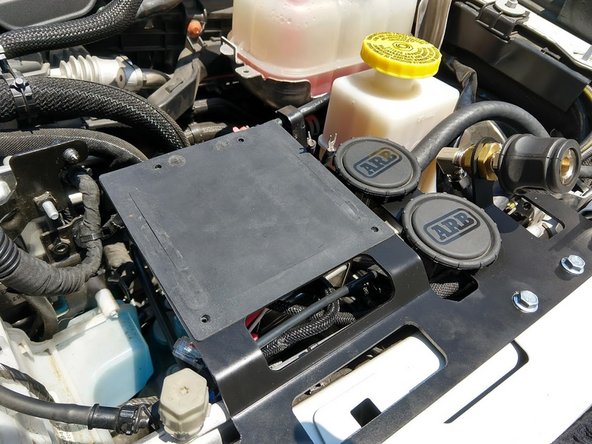
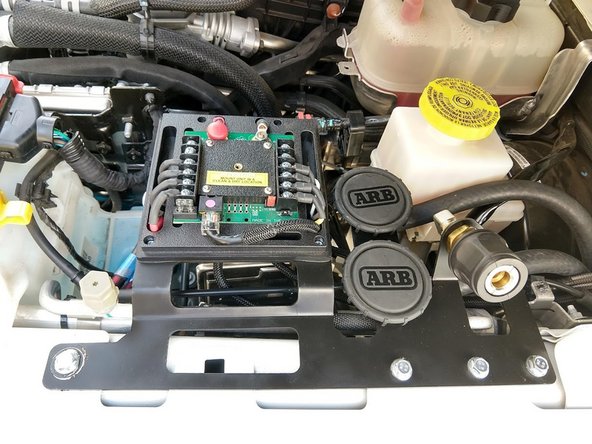
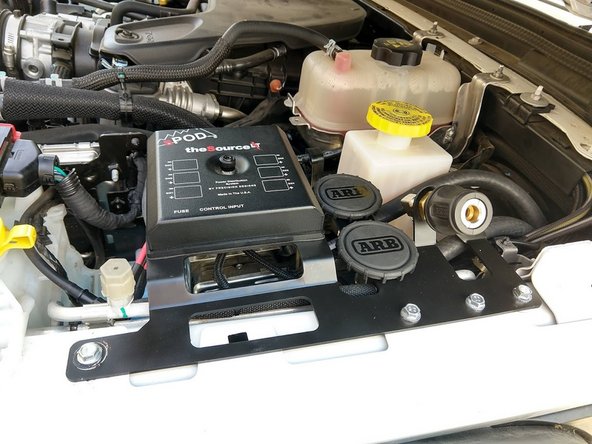
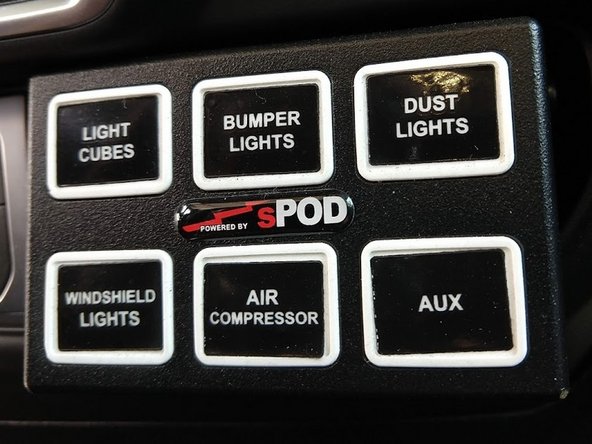
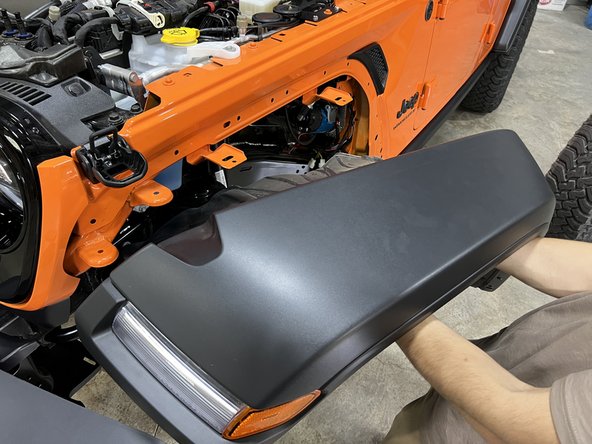
Installation is complete!
With any modified vehicle, or any vehicle used offroad, it is a good idea to check bolt torques periodically and visually inspect components regularly.
Installation is complete!
With any modified vehicle, or any vehicle used offroad, it is a good idea to check bolt torques periodically and visually inspect components regularly.

