
Introduction
This guide will walk through the correct installation procedure for the Grimm OffRoad Bronco Steel Front Bumper Light Bridge.
Consumer Warning
All Grimm OffRoad products must be installed by a competent and qualified individual in accordance with the installation instructions intended for the product. Incorrectly installed products will void any warranties and may result in damage to the product or damage to the vehicle it was installed on. Read any provided instructions or guides and watch any available videos before attempting installation. If there are any questions, please contact Grimm OffRoad before starting installation.
Many products require the vehicle be properly raised and supported off the ground. The installer is responsible for confirming that this may be done in a safe manner and the correct equipment is available to perform the installation. Grimm OffRoad installation instructions assume the installer is able to properly and safely lift the vehicle.
Vehicles that have been modified will not perform the same as a stock vehicle. It is incumbent upon the owner of the vehicle to be aware of the differences the modifications will make to the driving characteristics of the vehicle. These may include (but are not limited to): changes in handling, braking, rollover angle, incompatibilities with the factory anti-lock braking systems, stability control systems, or traction control systems.
Notes
- This light bridge is compatible with multiple combinations of pedestal style lights.
- Up to seven 3 inch lights
- Up to four 4 inch lights
- Up to three 6 inch lights
- Compatible with up to 3/8" or 10mm light mounting posts.
- This light bridge also includes mounting brackets for most 20 inch light bars.
-
-
Verify that all parts shown in the picture are present.
-
-
-
Remove the outside set of mounting screws on each side of the front steel bumper using a T40 torx plus bit.
-
These screws will be reused to install the light bridge.
-
-
-
It helps to attach the lights before installing the light bridge on the bumper.
-
Attach the lights to the light bridge or if using a light bar, attach the light bar brackets first.
-
Due to varying light bar widths, the mounting brackets may have to move slightly to fit.
-
Adjust lights to desired angle and tighten light mounting hardware to manufacturer's specifications.
-
Make sure everything is centered and if using the light bar brackets, torque the M8 bolts to 25 lb-ft [34 Nm].
-
-
-
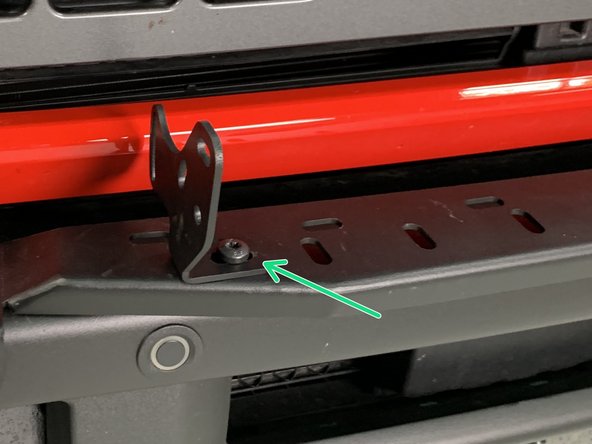
Install the light bridge to the bumper with the screws removed earlier.
-
Medium strength threadlocker is recommended and can be applied now.
-
With a T40 Torx Plus driver, torque the M8 Torx Plus screws to 25 lb-ft [34 Nm].
-
-
-
Wire lights or light bar per light manufacturer's instructions.
-


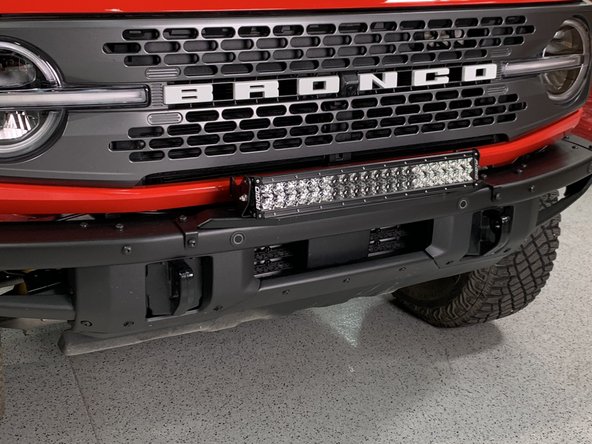
Installation is complete!
With any modified vehicle, or any vehicle used offroad, it is a good idea to check bolt torques periodically and visually inspect components regularly.
Installation is complete!
With any modified vehicle, or any vehicle used offroad, it is a good idea to check bolt torques periodically and visually inspect components regularly.
